How to add GPS Module to Heltec V3 Meshtastic Node
Quickly enhance your Heltec V3’s capabilities by adding a GPS module
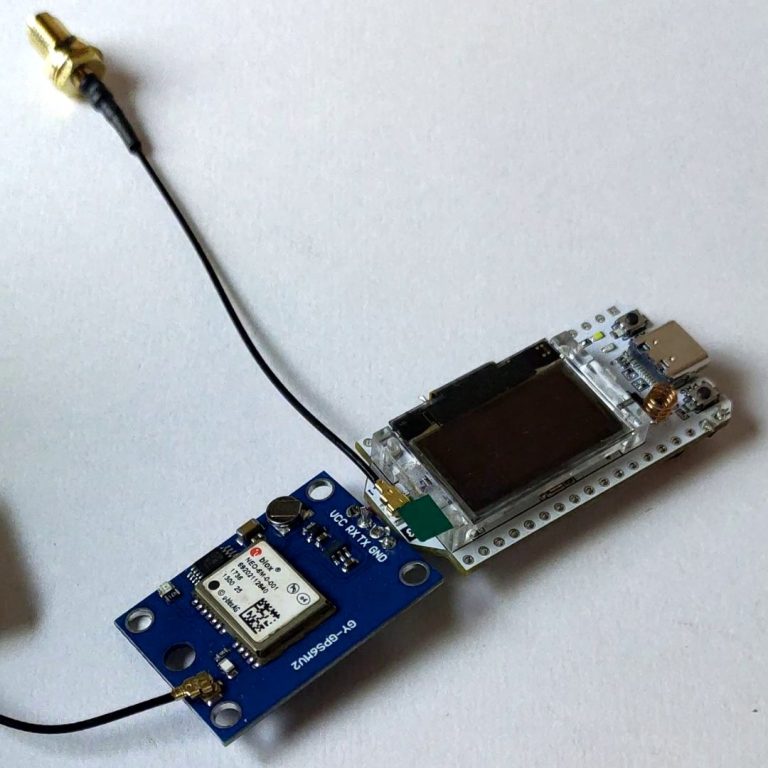
Adding a GPS Module to Heltec V3 Meshtastic Node: A Step-by-Step Guide
So, you’ve got yourself a Heltec V3 Meshtastic Node but realized it lacks GPS capability out of the box. No worries You can easily enhance its functionality by adding a GPS module. While options like the Heltec Wireless Tracker or LilyGo T Beam exist, you can also opt to integrate your own GPS module, such as the Neo 6M. This guide will walk you through the process step by step.
1. Gather Your Materials:
Before you begin, make sure you have the necessary components:
- Heltec V3 Meshtastic Node
- GPS Module (e.g., Neo 6M)
- Wires for connecting the GPS module to the Heltec V3
- TonyG’s Wiring Diagram (refer to it during installation)
2. Connect the GPS Module:
Refer to TonyG’s Wiring Diagram for precise instructions on how to connect the GPS module to the Heltec V3. Typically, this involves four simple connections between the devices.
Heltec V3 GPS Module Install Diagram
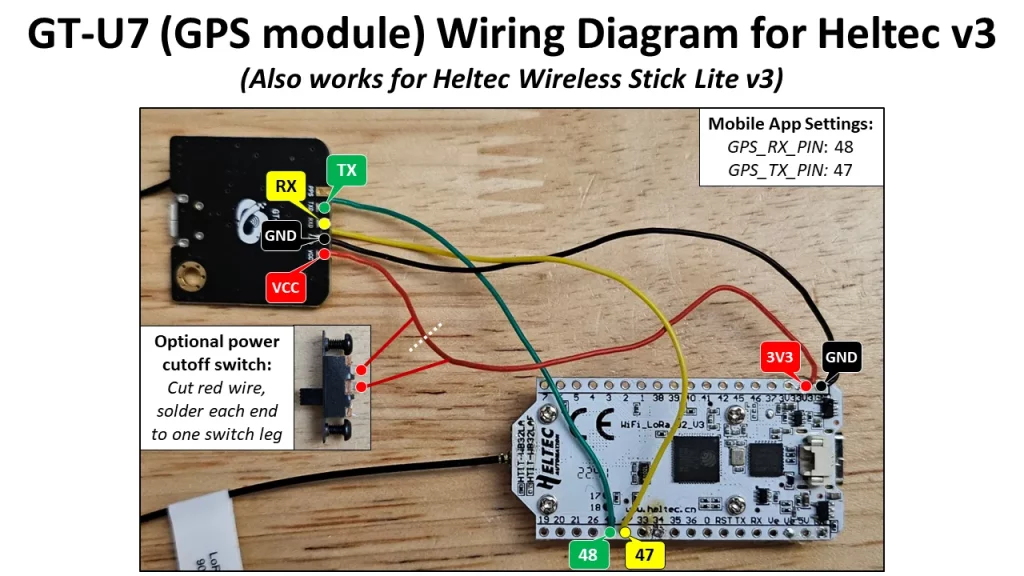
Image Credit: TonyG
3. Configure Position Settings:
Once the physical connections are made, it’s time to configure the settings on your Heltec V3 Meshtastic Node:
- Access the Position Settings on your device.
- Scroll down until you find the ‘GPS RX Pin’ option. Set it to 48.
- Next, locate the ‘GPS TX Pin’ option. Set it to 47. Note: This is the opposite of how you wired the board and device together.
- After configuring these settings, click ‘Send’ to save the changes.
4. Test and Verify:
After saving the settings, reboot your Heltec V3 Meshtastic Node. Allow it some time to acquire a GPS lock. Once the lock is acquired, your device will have full GPS capabilities.
5. Troubleshooting:
If you encounter any issues during the installation or configuration process, double-check your connections against TonyG’s Wiring Diagram. Ensure all connections are secure and correctly aligned. If problems persist, refer to the documentation provided with your GPS module for troubleshooting tips.
Enjoy Your Enhanced Functionality:
You’ve successfully added GPS capabilities to your Heltec V3 Meshtastic Node. Now you can enjoy improved tracking and location-based features on your device.
By following these steps and referring to TonyG’s Wiring Diagram, you can easily upgrade your Heltec V3 Meshtastic Node to include GPS functionality, expanding its capabilities and usefulness. Happy tracking
Converting a 144/430 VHF/UHF antenna to 868MHz for use with Meshtastic
Converting a 144/430 VHF UHF antenna to 868MHz for Meshtastic...
Read MoreMeshtastic Messenger – The Licence Free Off Grid Communication Platform
Meshtastic Messenger – The Licence Free Off Grid Communication Platform...
Read MoreMeshtastic Quick Chat Messages
Meshtastic Quick Chat Messages Enhancing Communication Efficiency with Quick Chat...
Read More
