Setup Node with the Official Meshtastic Flasher
Easily Flash & Setup Meshtastic in your Web Browser

Guide to Setting Up a Meshtastic Node on a Heltec Wireless Tracker
Setting up a Meshtastic node on a Heltec, Lillygo or other compatible device is a straightforward process thanks to the official Meshtastic Flasher. This browser-based tool simplifies the flashing of Meshtastic onto compatible devices, allowing you to have your node operational in just a few steps directly from your web browser. Follow the steps below to get started.
1. Install USB Drivers (if necessary):
Before beginning the setup process, ensure that you have installed the USB drivers for your device. You can find these drivers by navigating to this page
2. Connect Your Device:
Connect your device to your computer via USB. Be sure you are using a USB cable that is capable of data transmission (some modern cables only provide power)
3. Access the Meshtastic Flasher:
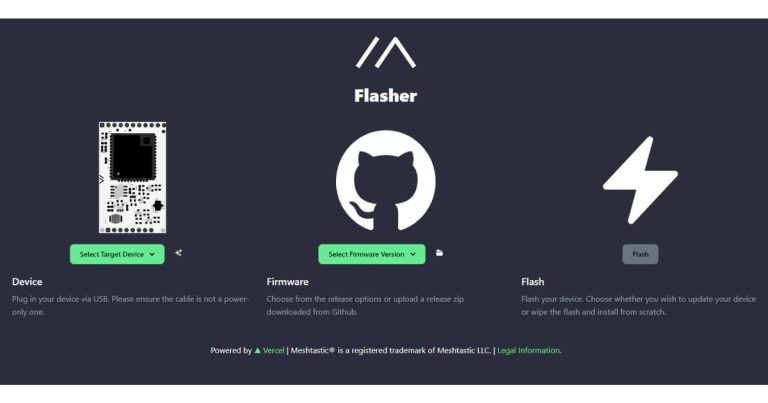
Open your web browser and go to flasher.meshtastic.org
4. Select Your Device:
Select your device from the list of compatible devices
5. Choose Firmware:
Select the firmware for your device. In most cases, it is recommended to choose the latest stable release
6. Flash Firmware:
Scroll down and click on “Flash”. Ensure that the baud rate is set to default. Toggle on “Full Erase” and “Install”, then click “Erase Flash and Install”.
7. Confirm COM Port:
Select the correct COM port for your device and confirm your selection.
8. Reboot Device:
After flashing, the device will reboot automatically.
9. Connect via Bluetooth:
Once the device has rebooted, you can connect to it via Bluetooth. Pair the device with your phone using the PIN that appears on the device
10. Configure with Meshtastic Android App:
Use the Meshtastic Android app to connect to the device. Set the correct LoRa Region, frequency, and device name as needed
Quickly setup and deploy Meshtastic Nodes
With the device now connected and configured, your Meshtastic node is ready to form part of the local mesh network. For the best experience, it’s recommended to leave most settings on default.
By following these simple steps, you can quickly set up your Meshtastic compatible device and start enjoying the benefits of mesh networking.
RAK Meshtastic Starter Kit
RAK Meshtastic Starter Kit An overview of the RAK Meshtastic...
Read MoreConverting a 144/430 VHF/UHF antenna to 868MHz for use with Meshtastic
Converting a 144/430 VHF UHF antenna to 868MHz for Meshtastic...
Read MoreMeshtastic Messenger – The Licence Free Off Grid Communication Platform
Meshtastic Messenger – The Licence Free Off Grid Communication Platform...
Read MoreMeshtastic Quick Chat Messages
Meshtastic Quick Chat Messages Enhancing Communication Efficiency with Quick Chat...
Read More


